
Get Google Apps here
This is an affiliate link. We believe in this product.
The steps below will enable you to set up Google Apps so that it is integrated with your domain and website, via cPanel as deployed by Hostgator. They may work with other hosts using cPanel.
About cPanel, Google Apps and Website Hosting
We resell Hostgator hosting services, including website and email hosting. In some instances, clients already have a Google Apps account set up when they decide to host with us. Google Apps is a paid (for most people) service that not only provides a Gmail-like email interface, but also facilitates group calendaring and document sharing. Terrific service (that used to be free for many). Our clients with Google Apps have their email (and usually calendaring and file sharing) hosted through Google Apps rather than through our hosting plan.
As a result, there are additional steps we need to go through to set up email. We outline those steps below. While we use cPanel via Hostgator, cPanel is fairly standard regardless of which host is deploying it. (More info about cPanel.) These steps likely will work even if Hostgator is not your host, but check with your host to be sure.
These steps worked as of the date this post was written. However, you should take these steps at your own risk (which can include affecting your ability to send or receive email). Consider making changes like this at a time when you can most afford email down time.
Steps to set up Google Apps email (and calendar and drive) in Hostgator Cpanel
- Your domain needs to be “verified” by Google Apps. This post assumes you’ve done that.
- At your domain registrar, you need to change the nameservers to the new host. In our case, our nameservers are ns1.goatcloudhosting.com and ns2.goatcloudhosting.com. If you use a different host, you will have different nameservers.
- At your host, if not set already, add an A record. Do that by logging into cPanel (with us, visit yourdomain.com/cpanel and log in with your credentials).
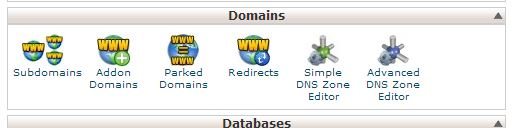
- Click on “Advanced DNS Zone Editor” in the “Domains” section of cPanel.
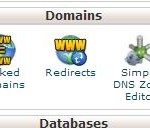
choose Advance DNS zone editor
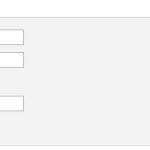
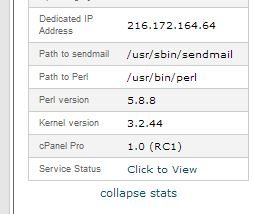
“Name” is your domain name. TTL is “14400”. Type is “A”. Address is the IP address assigned to your domain (which information you would have received at set up. If you are uncertain, go to cPanel home, and find the dedicated IP address.
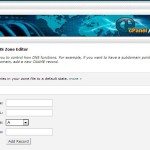
Add “A” record
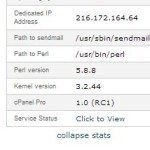
Find dedicated IP address
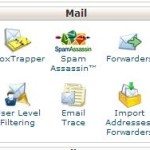
- Now we need to set up email routing. Go back to cPanel home.
- Let’s change MX records to reflect the Google Apps information. Click on “MX Entry” in the “Mail” section of cPanel.
Click on “MX Entry”.
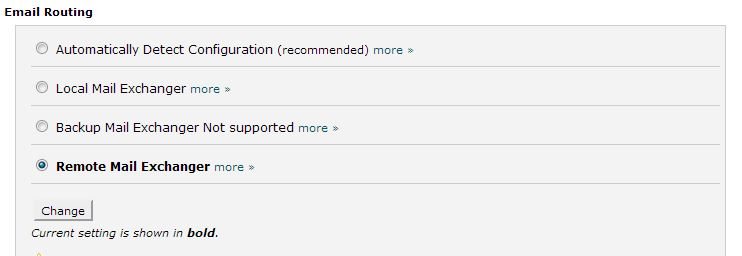
- Change Email Routing to “Remote Mail Exchanger”. Select “Remote Mail Exchanger” and click on “Change”.

Email Routing to “Remote Mail Exchanger”
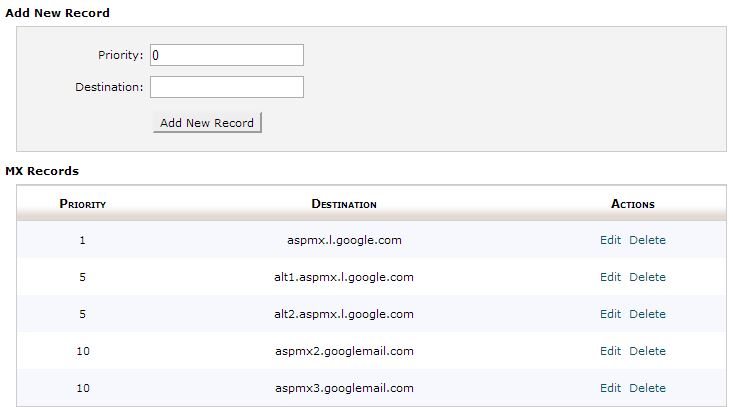
- Change MX Records. Delete any pre-existing “0” (zero) record and add all the Google Apps MX records as indicated in the image (see too the Hostgator support URL below).
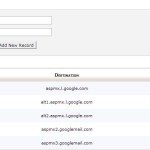
add all the Google Apps MX records
- Wait for propagation. Propagation is the process whereby the Internet is informed of how to to route email based on the settings changes you just made. It could take up to 72 hours, but may be much sooner.
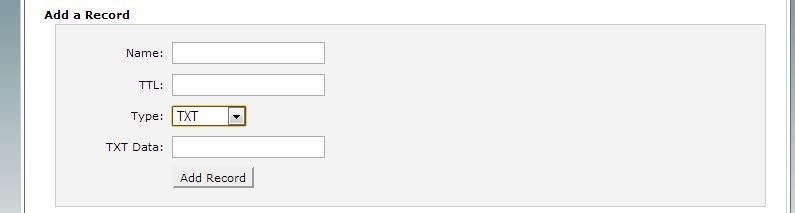
- Now let’s make sure we keep spam from your email. We need to create an SPF record. Go back to cpanel home and choose Advance DNS zone editor.
- Let’s add the record. “Name” is your domain name. TTL is “3600”. Type is “TXT”. “TXT Data” is “v=spf1 include:_spf.google.com ~all”. Make sure you have only one SPF record. Multiple records can confuse the Internet email system and facilitate your outbound messages incorrectly being marked as spam.
Add TXT SPF record
- Optional: Authenticate email sending with DKIM. This step is not covered here. There is information at the URL below.
- What about your Google Apps Calendar and Drive? When establishing your Google Apps account, you may have set it up so that people on your domain can easily access email, calendar or documents, such as by setting a URL like “mail.yourdomain.com” as the place to log in for email. If you did, to ensure uninterrupted service, you will want to create relevant CNAME records. Let’s say you are using the following URLs: mail.yourdomain.com (for email), calendar.yourdomain.com (calendar) and docs.yourdomain.com (Drive files). You’ll need a CNAME record for each.
- Let’s add the records. “Name” will be the URLs indicated immediately above (one record for each), mail.yourdomain.com, calendar.yourdomain.com, and docs.yourdomain.com. In each instance, TTL is “3600”; Type is “CNAME”; and “CNAME” is “ghs.googlehosted.com”.
- You did it! Let’s make sure you did it right. Check MX setup with MXToolbox. If setup is correct, you should get the MX records you entered in the steps above and email should be arriving as expected. Remember that propagation can take some time.

Want to do it yourself? Sign up for Google Apps here and tell ’em the Goat sent you!
Relevant links for setting up Google Apps via Hostgator Cpanel
- Google Apps
- Google Apps support: verify domain ownership
- Hostgator Google Apps walkthrough
- Hostgator Google Apps wizard
- Google Apps support: create SPF record
- Google Apps support: authenticate email with DKIM
- MX Toolbox SuperTool
Have you ever made this transition? What hurdles did you face? Do you know a better way? Leave a comment below.
Photo credit: Alligator 1 by Bogeskov, on Flickr
Many thanks for the help, solve our problems
So glad it worked for you, Gleriston!
Very helpful tutorial to setup Google Apps email on HostGator but now Google doesn’t offer free email service for custom domains 🙁 But we can use outlook to setup custom domain 🙂
Thanks for the comment. It’s true that Google Apps is no longer given away for free, unless you are a registered non-profit (Check out Google Apps for Non-Profits). Many domains with only a few users had free Google Apps grandfathered. We have helped multiple businesses migrate to Google Apps for email, calendar, shared documents and the rest. It’s still a decent bargain and can be had for less than $5 per month per user.
Would I still be able to access the old messages I’d had on the Hostgator server or are they lost forever?
Hi, Tabitha. You should still be able to access old messages via cPanel/webmail. The safest approach would be to download and archive any old messages on the old server before migrating to the new. You may also be able to import all those old messages into your new Google Apps email account.
Why you use “3600” in the TTL column? In my hostgator account, like mail.mydomainname.com, the TTL is 14400. What’s this matter?
Excellent question Deny. The TTL settings have to do with how often records are updated. Google indicates “TTL: “Time to Live.” How long it will take to update the record. This is measured in seconds. A TTL of 3600 seconds means records will take an hour to update. A TTL of 86400 means records will take a day to update. A higher TTL value means less traffic load for the DNS server, but it also means that changing the MX records will take longer.” See http://www.google.com/support/enterprise/static/postini/docs/admin/en/activate/mx_faq.html. Set a TTL record appropriate for your server.